Ever wonder how to draw a candle that glows right off the page?
I felt that spark too. It pulled me in fast.
Grab your pencil. Let’s light this up.
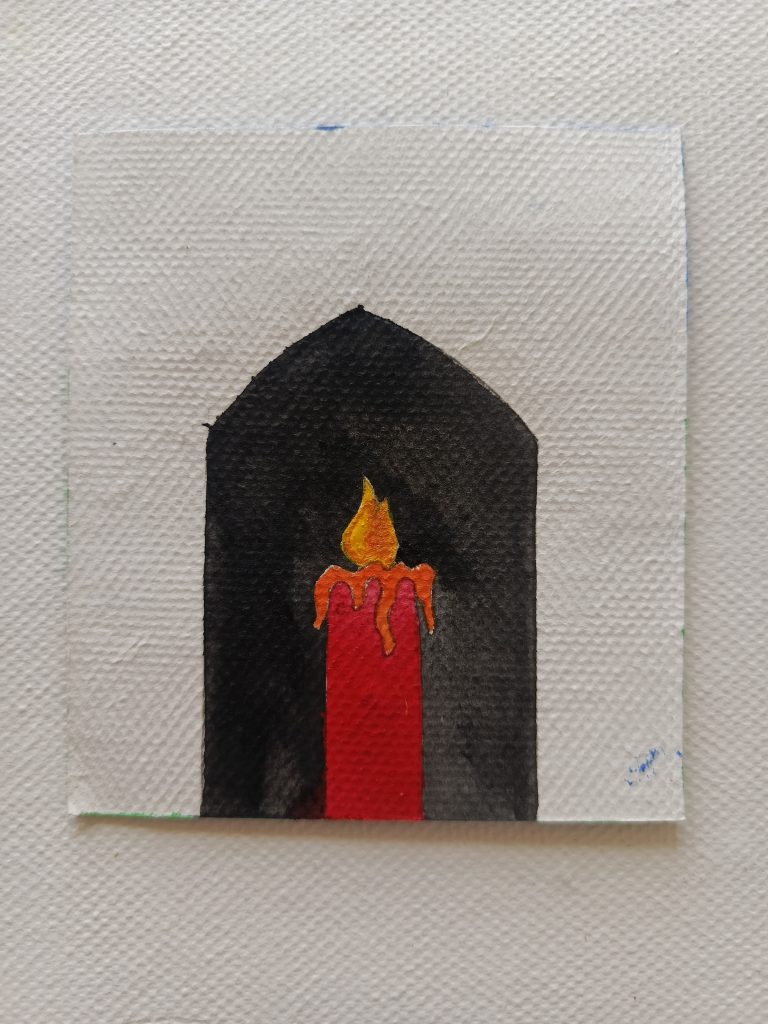
Why Drawing a Candle Is Such a Sweet Little Project
I love candles. There’s something about that soft flame and the wax dripping down the sides that just feels warm and inviting on paper. If you’ve been searching for how to draw a candle drawing that actually looks good, you’re in the right spot. This project is perfect for beginners who want a quick win, and it’s just as fun for experienced artists who want to practice shading and color blending.
A candle might seem like a small subject. But small subjects teach big lessons. You’ll practice shapes, shading, and color layering, all in one simple sketch. And honestly? There’s a certain magic in watching a plain rectangle turn into something that looks like it could flicker.
By the end of this guide, you’ll have a finished candle drawing you’re proud of. No fancy art degree required. Just a little patience and a willingness to get your hands a bit messy with paint.
Materials Needed
Before we start, let’s talk supplies. You don’t need a huge art cabinet for this one. Here’s a data-rich breakdown of exactly what you’ll need and why each item matters.
| Material | Purpose | Recommended Type | Beginner Friendly? |
|---|---|---|---|
| Watercolor paper | Holds paint without warping or bleeding through | 140lb cold press | Yes |
| Pencil | Sketches the base shapes before painting | HB or 2B graphite pencil | Yes |
| Acrylic paint | Adds bold, opaque color that layers well | Black, red, and yellow (basic set) | Yes |
| Paint brush | Applies paint smoothly and controls detail | Round brush, size 6 or 8 | Yes |
| Eraser | Cleans up stray pencil lines | Kneaded or vinyl eraser | Optional but helpful |
| Water cup | Rinses brush between colors | Any small jar | Yes |
That’s it. Four core items, plus a couple of helpful extras. Simple, right?
Key Terms to Know
Before diving into the steps, let’s clear up a few words you’ll see throughout this article. Think of this as your quick cheat sheet.
Acrylic paint : A fast-drying, water-based paint known for bold color and a smooth finish once dry.
Watercolor paper : A thicker, textured paper designed to absorb paint without buckling or tearing.
Base sketch : The light pencil outline that guides where your paint will go.
Layering : Applying one color on top of another, once the first has dried, to build depth.
Wick : The small string or line at the top center of a candle where the flame would sit.
Now that the vocabulary is out of the way, let’s get into the fun part.
Candle Drawing Instructions Step by Step
This is the heart of the tutorial. I’m going to walk you through draw a candle drawing step by step, just like I would if we were sitting at the same table with paint on our fingers. Follow along, and don’t rush it. Art is not a race.
Here are the candle drawing instructions, broken into clear, bite sized steps:
Step 1: Sketch the Outer Box
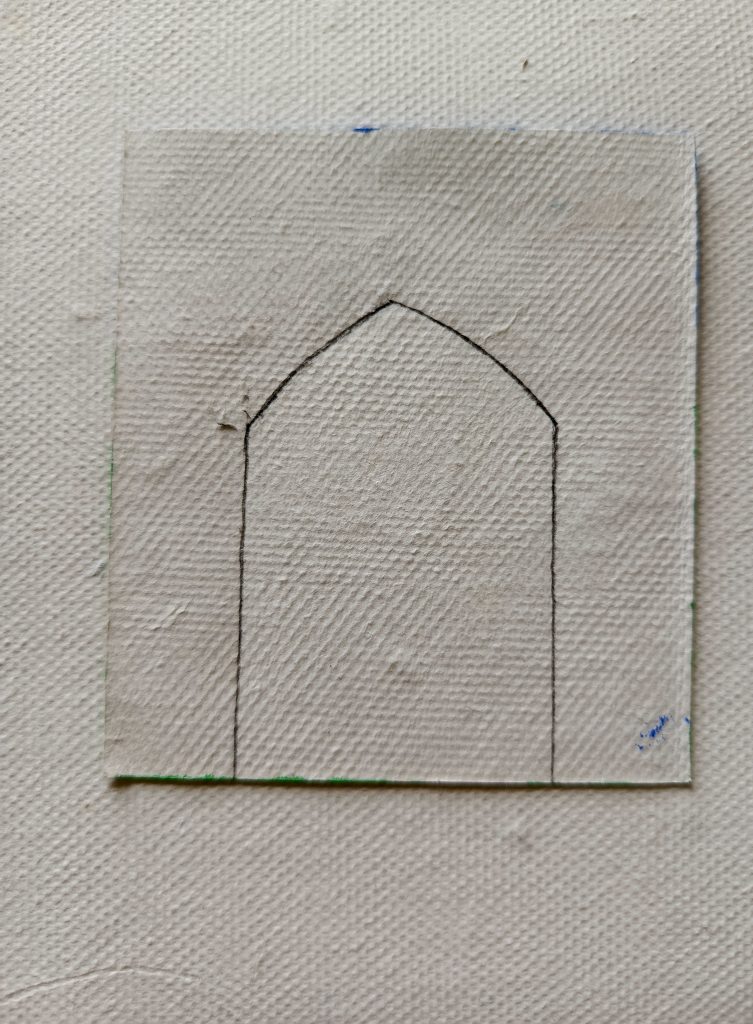
Using your pencil, lightly draw a rectangular box on your watercolor paper. This box sets the boundary for your whole scene, so take your time getting the proportions comfortable.
Step 2: Draw the Candle Shape Inside
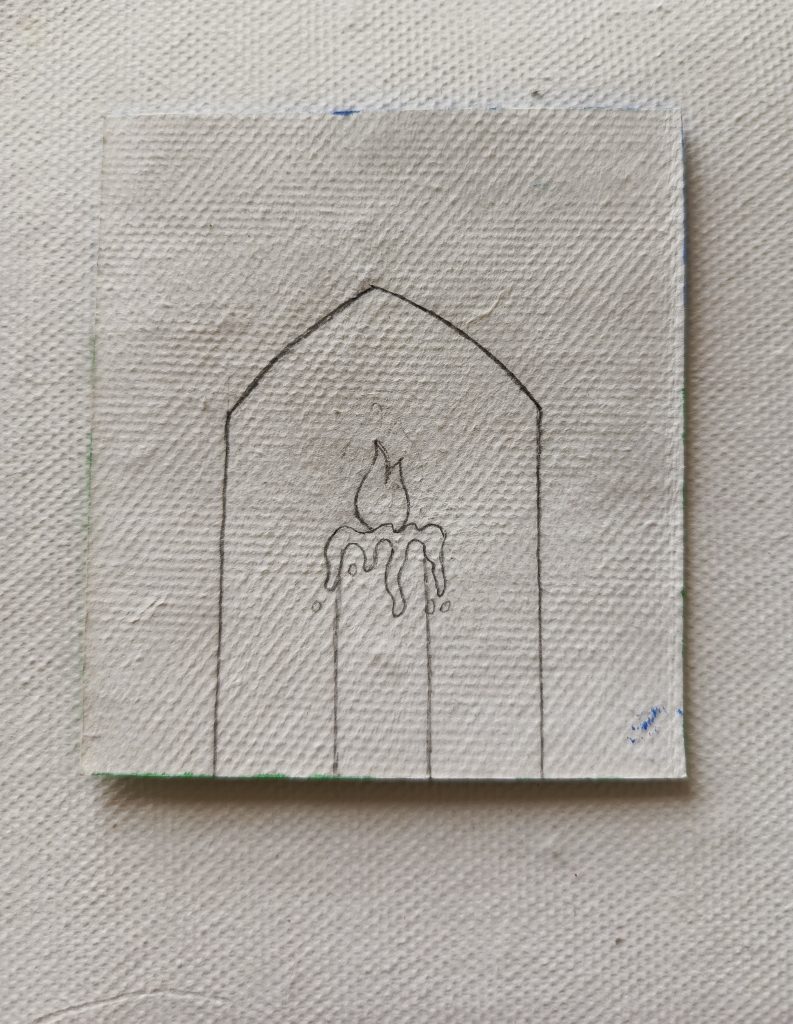
In the middle of that box, sketch a candle shape. Keep the lines light and loose at first. You can always darken them later.
Step 3: Paint the Background Black
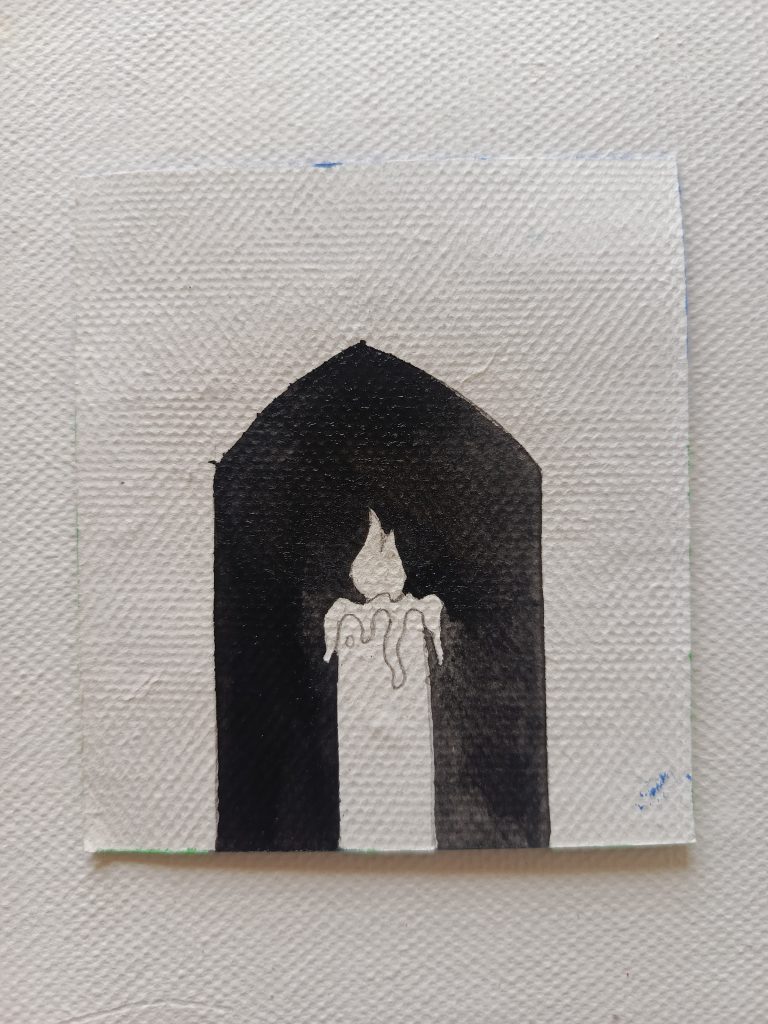
Once your pencil lines feel right, paint everything outside the candle shape with black acrylic. This creates a dramatic, moody backdrop that makes the candle pop.
Step 4: Paint the Candle Red
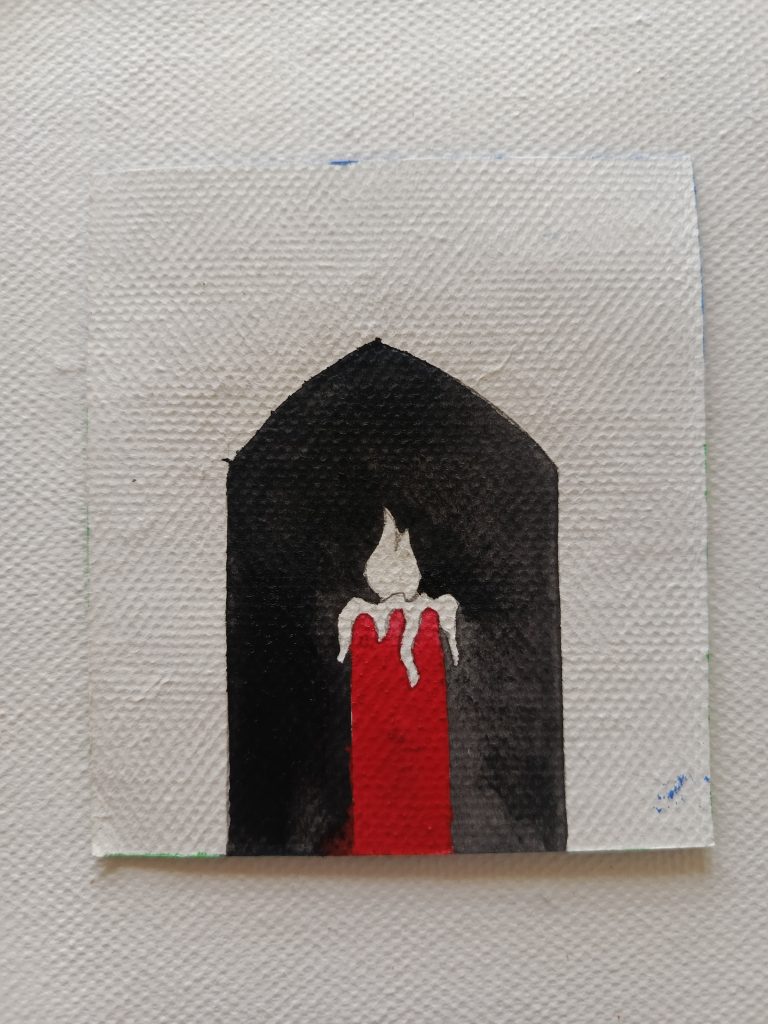
Switch brushes or rinse yours, then fill in the candle body with red paint. Let it dry a bit between coats if you want a richer, more solid color.
Step 5: Add Yellow to the Top
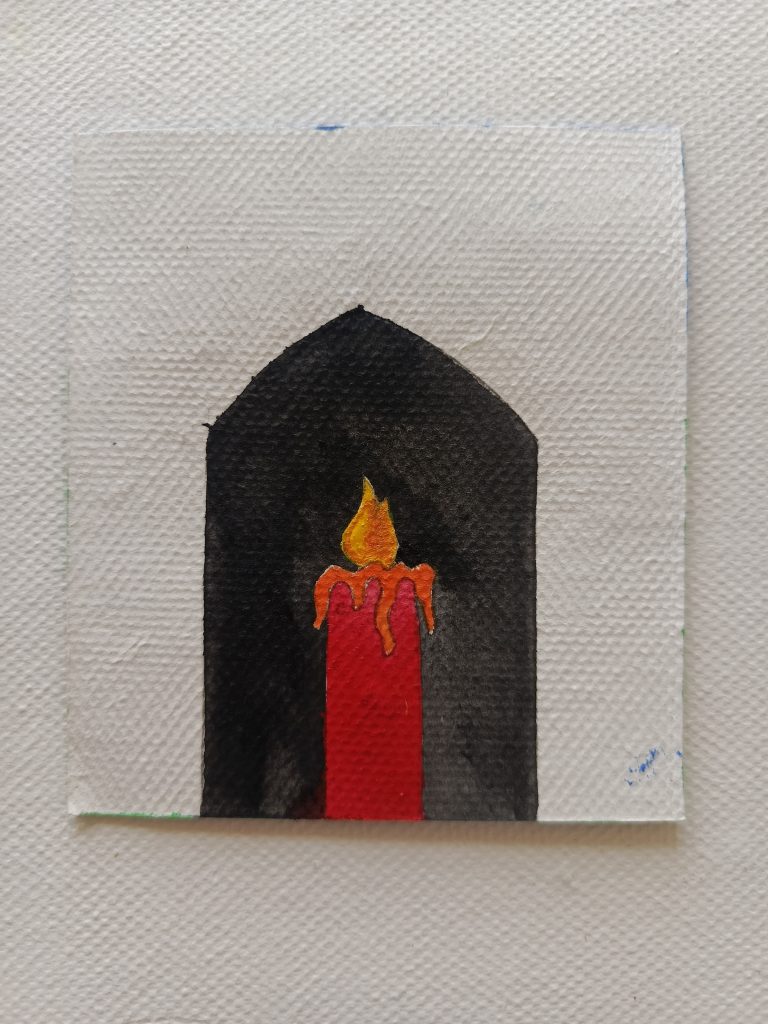
Finally, paint the very top of the candle with yellow. This represents the glow near the wick and gives your piece that warm, flickering feel.
And that’s genuinely it. Five steps, one cozy little painting.
Tips for Success
Want your candle drawing to look polished? Here are a few things I’ve picked up along the way.
- Keep your pencil lines light. Heavy graphite can bleed through thin paint layers.
- Let each color dry before adding the next. Wet paint on wet paint gets muddy fast.
- Use a smaller brush for the wick area. Precision matters more in tiny details.
- Don’t overthink the flame shape. A slightly imperfect glow still reads as a candle.
- Step back often. Looking at your work from a distance helps you catch mistakes early.
I remember the first time I tried this project. I rushed the black background and it ended up patchy. Slowing down fixed that instantly. Patience really is the secret ingredient here.
Common Mistakes and How to Avoid Them
Even simple projects trip people up sometimes. Here’s what usually goes wrong, and how to sidestep it.
- Skipping the pencil sketch. Jumping straight to paint often leads to lopsided shapes. Always sketch first.
- Using too much water with acrylics. This thins the paint and weakens your colors. Keep your brush just barely damp.
- Painting colors too close together while wet. This causes bleeding between the red and yellow. Wait for each layer to dry.
- Ignoring the paper texture. Thin printer paper warps under wet paint. Stick with real watercolor paper.
- Rushing the black background. A hurried background looks streaky. Take a few extra minutes here; it’s worth it.
None of these mistakes are a big deal in the moment. But knowing them ahead of time saves you a headache later.
Fun Variations to Try
Once you’ve nailed the basic version, why not switch things up? Here are a few ideas I love.
- Add a glow effect. Blend a little yellow or white around the top edges for a soft halo.
- Try a colored wax drip. Add small paint drips along the sides of the candle for texture.
- Change the background color. Swap black for deep blue or purple for a different mood.
- Group multiple candles. Paint two or three candles of varying heights in one box for a cozy scene.
- Go monochrome. Use just one color family for a more minimalist, modern look.
These small tweaks turn one simple tutorial into a whole series of art pieces. Kids drawing with you? Let them pick their own color combo. It’s a great easy drawing activity for all ages.
FAQs
Do I need expensive paint for this project? Not at all. A basic student-grade acrylic set works perfectly fine for this candle.
Can I use markers instead of acrylic paint? Yes, though the colors won’t blend the same way. Markers give a flatter, more graphic look.
How long does the whole project take? Most people finish in about thirty to forty five minutes, including drying time between layers.
Is this a good project for kids? Definitely. It’s simple enough for young artists, especially with adult supervision around the paint and water.
What if my lines aren’t perfectly straight? That’s okay. A slightly wobbly candle still looks charming and handmade. Perfection isn’t the goal here.
Wrapping It Up
So there you have it, a full walkthrough on how to draw a candle drawing from a blank sheet of watercolor paper to a warm, glowing finished piece. We covered materials, key terms, the full step by step process, tips, common mistakes, and even a few fun variations to keep things fresh.
Give it a try this weekend. Grab your paper, your paints, and just start. I’d genuinely love to hear how yours turns out, so feel free to share your results or ask questions in the comments. Happy painting, friends.